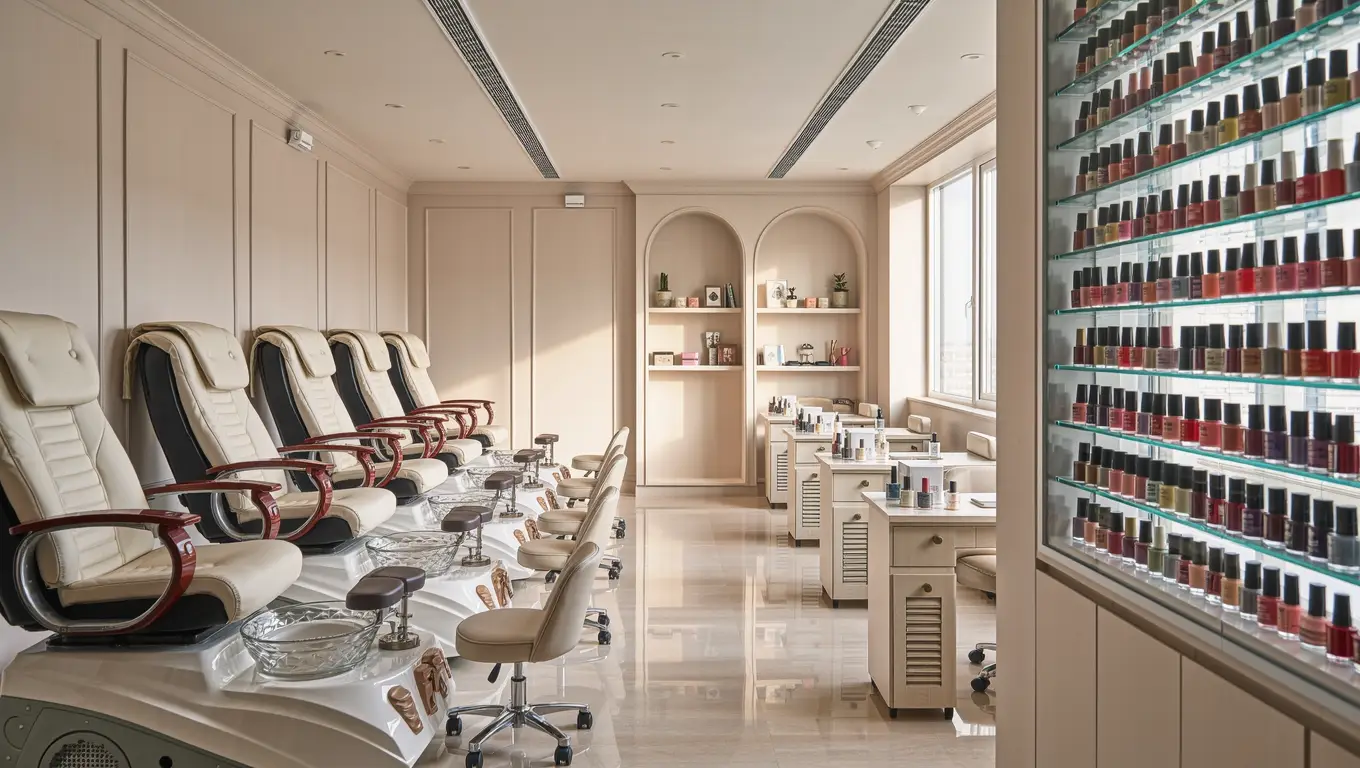
A practical nail salon layout puts reception and retail at the front, a row of plumbed pedicure chairs along the wall with drains and dedicated circuits, and manicure tables with local exhaust in the middle or opposite wall. Plan ventilation first, then keep a 36-inch aisle and a hand sink nearby.
Key takeaways
- Plan the pedicure row first. Each plumbed chair needs hot and cold supply, a drain with a trap and its own GFCI circuit, so they belong on one wall.
- New York requires a source-capture exhaust inlet within 12 inches of each nail station and at least 50 CFM per station, vented outdoors.
- A typical pedicure chair is about 54 to 60 inches long and may need about 18 inches behind it to recline; plan 6 to 7 feet of depth per chair.
- Manicure tables need room for the technician, the client chair and a ventilation unit or ducting; allow about 6 by 7 feet per single table.
- Put a hand sink in or next to the manicure area, a disinfection station near the back, and the dryer bar between service and checkout.
What makes nail salon layouts different
A nail salon combines two very different services in one room. Pedicures need water, drains and power at every chair. Manicures and enhancements create dust and chemical vapor right at the table. Both are done with the technician seated and bent toward the client for long periods. A good layout solves plumbing, ventilation and posture at the same time, and the order you plan them in matters.
Step 1: Plan ventilation before furniture
Ventilation is the part of a nail salon plan that is hardest to change later. The U.S. EPA’s guide for nail salon owners recommends local exhaust near work tables, either a table with a built-in exhaust vent vented to the outdoors or a ceiling or wall-mounted system with an intake suspended above the table, and individual exhaust vents for each work table where local code allows (U.S. EPA, Protecting the Health of Nail Salon Workers). It also advises keeping the general HVAC running during work hours.
Some jurisdictions turn this into a rule. New York’s Department of State requires nail salons to have a system designed to capture vapors, dust and contaminants at their source, with at least one exhaust inlet per nail station, either built into the station or within 12 inches of where products are applied, exhausted outdoors. Supply and exhaust must each be at least 50 CFM per nail station or the International Mechanical Code rate, whichever is greater (New York Department of State, Ventilation Regulations). In Boston, the Public Health Commission’s nail salon regulation requires ventilation that meets the mechanical code minimums, a hand-washing sink in or adjacent to the manicuring area and an eyewash station within 10 seconds or 100 feet of each manicure station (Boston Public Health Commission, Nail Salon Regulation).
The practical result is that your manicure tables should be placed where ducts can reach the outside wall or roof, and each table should have its own capture point. Decide that with your mechanical contractor first, then place the tables.
Step 2: Lay out the pedicure row
Plumbed pedicure chairs are the biggest and most fixed items in the salon. Group them along one wall, ideally the one nearest existing drain lines, so each chair can connect to a shared drain through its own trap.
Manufacturer manuals give a good idea of what each chair needs. One U.S. pedicure spa manual lists a 110V, 60Hz, 15-amp GFCI-protected grounded circuit for each spa, 30 to 80 psi water pressure, half-inch hot and cold supply, a 1.5-inch drain with a U-trap and a check valve installed by a licensed plumber, and a base placed 18 inches from the wall so the backrest can fully recline. The same unit measures 60 by 30 by 55 inches (Minerva Beauty, Cleo SE Pedicure Spa Manual). Your chair’s manual will differ, so always plan from the actual spec sheet.
| Pedicure row item | Planning range | Notes |
|---|---|---|
| Chair footprint | About 54 to 60 in long, 30 to 32 in wide | Includes the foot basin |
| Space behind the chair | Per manual; one model lists 18 in | Allows full recline |
| Center to center spacing | About 4 to 5 ft | Room for armrests, a side tray and privacy |
| Technician zone in front | About 3 ft | Pedicure stool and cart at the basin |
| Total depth per row | About 7 to 8 ft plus aisle | Wall to edge of technician zone |
| Electrical | Dedicated GFCI circuit per chair | Licensed electrician, local code |
| Plumbing | Hot and cold supply, drain with trap per chair | Licensed plumber, backflow device per code |
If plumbing is not possible in part of the space, pipeless or no-plumbing chairs can fill the gap, but they still need power and a plan for filling and draining. Our guide to pedicure chair plumbing and electrical requirements covers the details.
Cleaning and sanitation space
Sanitation rules affect the layout too. In California, pipeless footspas must be drained, scrubbed and run with an EPA-registered disinfectant for at least 10 minutes after each client, and clean non-whirlpool basins must be stored in a covered place labeled “Clean” or “Disinfected” (16 CCR §§980.2 and 980.3, California Board of Barbering and Cosmetology, Article 12). Plan a back-of-house sink, basin storage and a disinfection station close to the pedicure row so technicians are not carrying tubs through the salon.
Step 3: Place the manicure tables
A single manicure table is usually 36 to 48 inches wide and 18 to 22 inches deep. Add a technician chair on one side, a client chair on the other and space to get in and out, and each table needs a zone of about 6 by 7 feet. Double manicure tables save space by sharing a center section.
| Manicure layout | Space per technician | Best for |
|---|---|---|
| Single tables in rows | About 40 to 45 sq ft | Flexible layouts, easy to move tables |
| Double tables back to back | About 35 to 40 sq ft | High-volume salons in a smaller footprint |
| Long bar along a wall | About 30 to 35 sq ft | Express services and gel bars, ducts on one wall |
Tables with a built-in dust collector or downdraft vent give each station a capture point at the work. Keep the top of a ventilated table clear of towels, as the EPA guide notes, and plan where the filter units sit so they can be changed without moving the table. Our nail table with dust collector is one option, and our article on nail tables with vents explains how the systems differ.
Step 4: Design for technician posture
OSHA’s guidance for nail salon workers recommends chairs that adjust up and down with back support, feet flat on the floor or on a footrest, lighting good enough to see without bending over the table, raising the client’s hand or foot, and padding table edges so wrists and forearms do not rest on hard or sharp edges (OSHA, Health Hazards in Nail Salons: Positions and Motions).
- Choose technician chairs and pedicure stools with adjustable height and a backrest.
- Specify manicure tables with rounded or padded front edges, or plan an armrest cushion.
- Choose pedicure chairs with an adjustable footrest so the client’s foot can be raised to the technician.
- Plan task lighting at every station, not just ceiling lights.
Step 5: Reception, drying and flow
The client journey in a nail salon usually runs from reception to color selection, to the pedicure chair, to the manicure table, to the dryer, then to checkout. Arrange zones in that order so clients do not cross back through the room with wet nails.
- Reception and polish wall: at the front, with the color display where clients can browse while waiting.
- Pedicure row: along a side or rear wall where plumbing runs.
- Manicure area: in the center or opposite wall, close to exhaust routes.
- Dryer bar: between the manicure area and checkout, so clients finish drying near the exit.
- Back of house: disinfection, storage, laundry and staff space, with chemicals in a closed cabinet away from heat.
Keep the main aisle at least 36 inches clear, the 2010 ADA Standards minimum for an accessible route, and plan at least one manicure table and the restroom along that route. Many salons also plan one pedicure station that a client using a wheelchair can reach, such as a chair with a removable side or a low bench with a portable basin.
Sample plan: 1,000 square feet
A 25 by 40 foot storefront could hold reception and a polish wall in the front 10 feet, six pedicure chairs along one long wall at about 4.5-foot centers, six single manicure tables with local exhaust along the opposite wall, a four-seat dryer bar near checkout, and a back area with a disinfection sink, storage and a restroom. Ducting runs along the manicure wall to the rear or roof. Exact counts depend on your ventilation route, existing drains and local code.
Furnishing the plan
Once the zones are fixed, you can match equipment to them: pedicure chairs from our pedicure spa chair range and manicure tables, reception desks and stations from our stations and reception collection. Everything is made to order in our factory, built for 110 to 120V, 60Hz power, and we confirm UL or ETL listing status for each electrical model in the quotation.
Frequently asked questions
How much space does a pedicure chair need?
Plan about 4 to 5 feet center to center and 7 to 8 feet of depth, including the chair, the space behind it to recline and the technician’s stool in front of the basin. One manufacturer’s manual lists a 60 by 30 inch chair placed 18 inches from the wall. Always check your chair’s installation manual.
Do nail tables need ventilation?
In many places it is strongly recommended, and in New York it is required. New York’s rules call for an exhaust inlet within 12 inches of each nail station, at least 50 CFM per station, exhausted outdoors. The U.S. EPA recommends local exhaust at every work table. Check your state and city rules.
Where should pedicure chairs go in a nail salon?
Group them along the wall nearest existing drain and supply lines, so each chair connects to a shared drain through its own trap. Each plumbed chair also needs a dedicated GFCI circuit. Keeping them on one wall reduces trenching and wiring cost and leaves the rest of the floor for manicure tables.
How many manicure tables fit in a small nail salon?
Allow about 35 to 45 square feet per technician, depending on whether you use single or double tables. A 1,000 square foot salon with six pedicure chairs, reception and back of house can often fit around six manicure tables. Ventilation routes and exits usually set the final count more than floor area does.
Share your floor plan and we will map pedicure chairs, manicure tables and ventilation positions through our design and layout service.
Sources
- New York Department of State — Ventilation Regulations for Nail Salons
- U.S. EPA — Protecting the Health of Nail Salon Workers
- OSHA — Health Hazards in Nail Salons: Positions and Motions
- Boston Public Health Commission — Nail Salon Regulation
- California Board of Barbering and Cosmetology — Article 12, Health and Safety
- Minerva Beauty — Cleo SE Pedicure Spa Manual
Fitting out a salon?
Send your floor plan or model list. Our factory replies with specifications, lead times and freight to your ZIP code within one business day.


